Appearance
ubuntu 20.04 64位
1. 安装 mysql 软件
- 需要更新升级软件包
shell
# apt update
# apt upgrade- 安装
mysql-serverpackage:
sh
# apt install mysql-server2. 配置 mysql
- 配置软件包
shell
# mysql_secure_installation- 设置root密码, 需要重新设置
root密码. 这里选择Y.
sh
Securing the MySQL server deployment.

Connecting to MySQL using a blank password.

VALIDATE PASSWORD COMPONENT can be used to test passwords
and improve security. It checks the strength of password
and allows the users to set only those passwords which are
secure enough. Would you like to setup VALIDATE PASSWORD component?

Press y|Y for Yes, any other key for No: y- 选择设置密码的级别. 这里我们选择最高的级别:
2
sh
There are three levels of password validation policy:

LOW    Length >= 8
MEDIUM Length >= 8, numeric, mixed case, and special characters
STRONG Length >= 8, numeric, mixed case, special characters and dictionary                  file

Please enter 0 = LOW, 1 = MEDIUM and 2 = STRONG: 2- 输入密码, 密码要求, 必须大于8, 并字母大小写和特殊字符. 例:
sdDWE$RQWE%434
sh
Please set the password for root here.

New password:

Re-enter new password:- 删除
anonymous用户, 选择Y.
sh
Estimated strength of the password: 100
Do you wish to continue with the password provided?(Press y|Y for Yes, any other key for No) : y
By default, a MySQL installation has an anonymous user,
allowing anyone to log into MySQL without having to have
a user account created for them. This is intended only for
testing, and to make the installation go a bit smoother.
You should remove them before moving into a production
environment.

Remove anonymous users? (Press y|Y for Yes, any other key for No) : y
Success.- 关闭
root远程连接功能. 选择Y.
sh
Normally, root should only be allowed to connect from
'localhost'. This ensures that someone cannot guess at
the root password from the network.

Disallow root login remotely? (Press y|Y for Yes, any other key for No) : y
Success.- 删除 test 数据库, 选择
Y.
sh
By default, MySQL comes with a database named 'test' that
anyone can access. This is also intended only for testing,
and should be removed before moving into a production
environment.


Remove test database and access to it? (Press y|Y for Yes, any other key for No) : y
 - Dropping test database...
Success.

 - Removing privileges on test database...
Success.- 重新加载数据库, 选择
Y.
sh
Reloading the privilege tables will ensure that all changes
made so far will take effect immediately.

Reload privilege tables now? (Press y|Y for Yes, any other key for No) : y
Success.

All done!3. 本地连接数据库
shell
$ mysql -u root -p
## OR ##
# mysql -h localhost -u root -p创建数据库和用户, 列如:
text
* DB_NAME = webdb
* USER_NAME = webdb_user
* REMOTE_IP = 10.0.15.25
* PASSWORD = password123
* PERMISSIONS = ALL4. 创建数据库和用户
CREATE DATABASE
mysqlmysql> CREATE DATABASE webdb;CREATE USER
mysqlmysql> CREATE USER 'webdb_user'@'%' IDENTIFIED BY 'password123';GRANT PERMISSIONS
mysqlmysql> GRANT ALL ON webdb.* TO webdb_user@'%'; mysql> grant all on webdb.* to webdb_user@'%';FLUSH PRIVILEGES, Tell the server to reload the grant tables
mysqlmysql> FLUSH PRIVILEGES;mysql 注: 更新用户可以访问的限制,
%是表示任何IP地址可以访问的.mysqlmysql> update user set host='%' where user='root'
5. 修密码等级
如果设置出现 ERROR 1819 (HY000): Your password does not satisfy the current policy requirements 错误信息, 是因为密码的等级设置过高, 需要将安全等降低或是重新用随机软件生成密码.
mysql
## 查看密码安全等级
mysql> set global validate_password.policy=0;
Query OK, 0 rows affected (0.00 sec)

mysql> SHOW VARIABLES LIKE 'validate_password%';
+--------------------------------------+-------+
| Variable_name                        | Value |
+--------------------------------------+-------+
| validate_password.check_user_name    | ON    |
| validate_password.dictionary_file    |       |
| validate_password.length             | 8     |
| validate_password.mixed_case_count   | 1     |
| validate_password.number_count       | 1     |
| validate_password.policy             | LOW   |
| validate_password.special_char_count | 1     |
+--------------------------------------+-------+
14 rows in set (0.00 sec)

## 创建新用户
mysql> create user 'user'@'%' identified by 'abcd1234';
Query OK, 0 rows affected (0.08 sec)ubuntu 16.04 64位
需要新更新系统.
sh
# apt update
# apt install -y build-essentialinstall node.js
install node.js for v6.11.3
- 需要配置node.js源, 添加到服务器中.
ssh
# curl -sL https://deb.nodesource.com/setup_6.x | sudo -E bash -
# apt install -y nodejsinstall mongodb
install mongodb enterprise
- Import the public key used by the package management system.
sh
sudo apt-key adv --keyserver hkp://keyserver.ubuntu.com:80 --recv 0C49F3730359A14518585931BC711F9BA15703C6- Create a /etc/apt/sources.list.d/mongodb-enterprise.list file for MongoDB.
sh
echo "deb [ arch=amd64,arm64,ppc64el,s390x ] http://repo.mongodb.com/apt/ubuntu xenial/mongodb-enterprise/3.4 multiverse" | sudo tee /etc/apt/sources.list.d/mongodb-enterprise.list- Reload local package database.
sh
sudo apt-get update- Install the MongoDB Enterprise packages.
sh
sudo apt-get install -y mongodb-enterprisemongodb command:
- start mongodb
sh
service mongod startmongodb config:
sh
# vim /etc/mongodb.confbootstart mongodb
sh
root@iZrj978n2nwntexfoyz539Z:~# cat mongod.sh
#!/bin/sh
#title         :mongod.sh
#author        :Richard Wang
#date          :22/09/2017
#description   :start/stop/restart mongod
#########################################
### install   :  cp mongod /etc/init.d/
#                update-rc.d mongod defaults
### uninstall :  update-rc.d -f mongodb remove

PATH_TO_MONGO=/usr/bin/mongod

#file containing all mongodb pid
PID_FILE=/tmp/mongodb.pid

case "$1" in
	start)
		echo "Starting mongodb service..."

		COMMAND_TO_RUN=`start-stop-daemon -S -b -m -p $PID_FILE -x $PATH_TO_MONGO& :`
		setsid sh -c $COMMAND_TO_RUN> /dev/null 2>&1 < /dev/null

		echo -e "Start mongodb server [ OK ]"
		;;
	stop)
		echo "Stopping mongodb service..."

		start-stop-daemon -K -q -p $PID_FILE

		echo -e "Stop mongodb server [ OK ]"
		;;
	restart|reload)
		"$0" stop
		"$0" start
		;;
	*)
		echo $"Usage: $0 {start|stop|restart}"
		exit 1
esac

exit $?install monod
sh
cp mongod.sh /etc/init.d/mongod
chmod 755 /etc/init.d//mongod
update-rc.d mongod defaultsRemove Mongodb
sh
apt-get purge mongodb-enterprise*delete log file
sh
sudo rm -r /var/log/mongodb
sudo rm -r /var/lib/mongodbnginx
- install nginx
sh
# apt install nginx- nginx config
http.conf
sh
vim /etc/nginx/sites-available/http.confhttp.conf:
sh
server {
	server_name xxx.com www.xxx.com
	listen 80;
	location / {
		proxy_pass http://127.0.0.1:3000;
	}
}ln
sh
cd /etc/nginx/sites-enabled
ln -s /etc/nginx/sites-available/http.confhttps configure:
sh
server {
	server_name xxx.com www.xxx.com;
	listen 80;
	return 301 https://$host$request_uri;
}
server {
	listen 443;
	ssl on;
	server_name xxx.com www.xxx.com;
	ssl_certificate   cert/xxx.pem;
	ssl_certificate_key  cert/xxx.key;
	ssl_session_timeout 5m;
	ssl_ciphers ECDHE-RSA-AES128-GCM-SHA256:ECDHE:ECDH:AES:HIGH:!NULL:!aNULL:!MD5:!ADH:!RC4;
	ssl_protocols TLSv1 TLSv1.1 TLSv1.2;
	ssl_prefer_server_ciphers on;
	location / {
		proxy_pass http://127.0.0.1:3000;
	}
}使用 cloudflare 的证书 实现 HTTPS 服务器的配置
这块设置一共分为两大块,是在 cloudflare 网站上申请证书,在服务器上配置使用证书。
cloudflare 证书申请
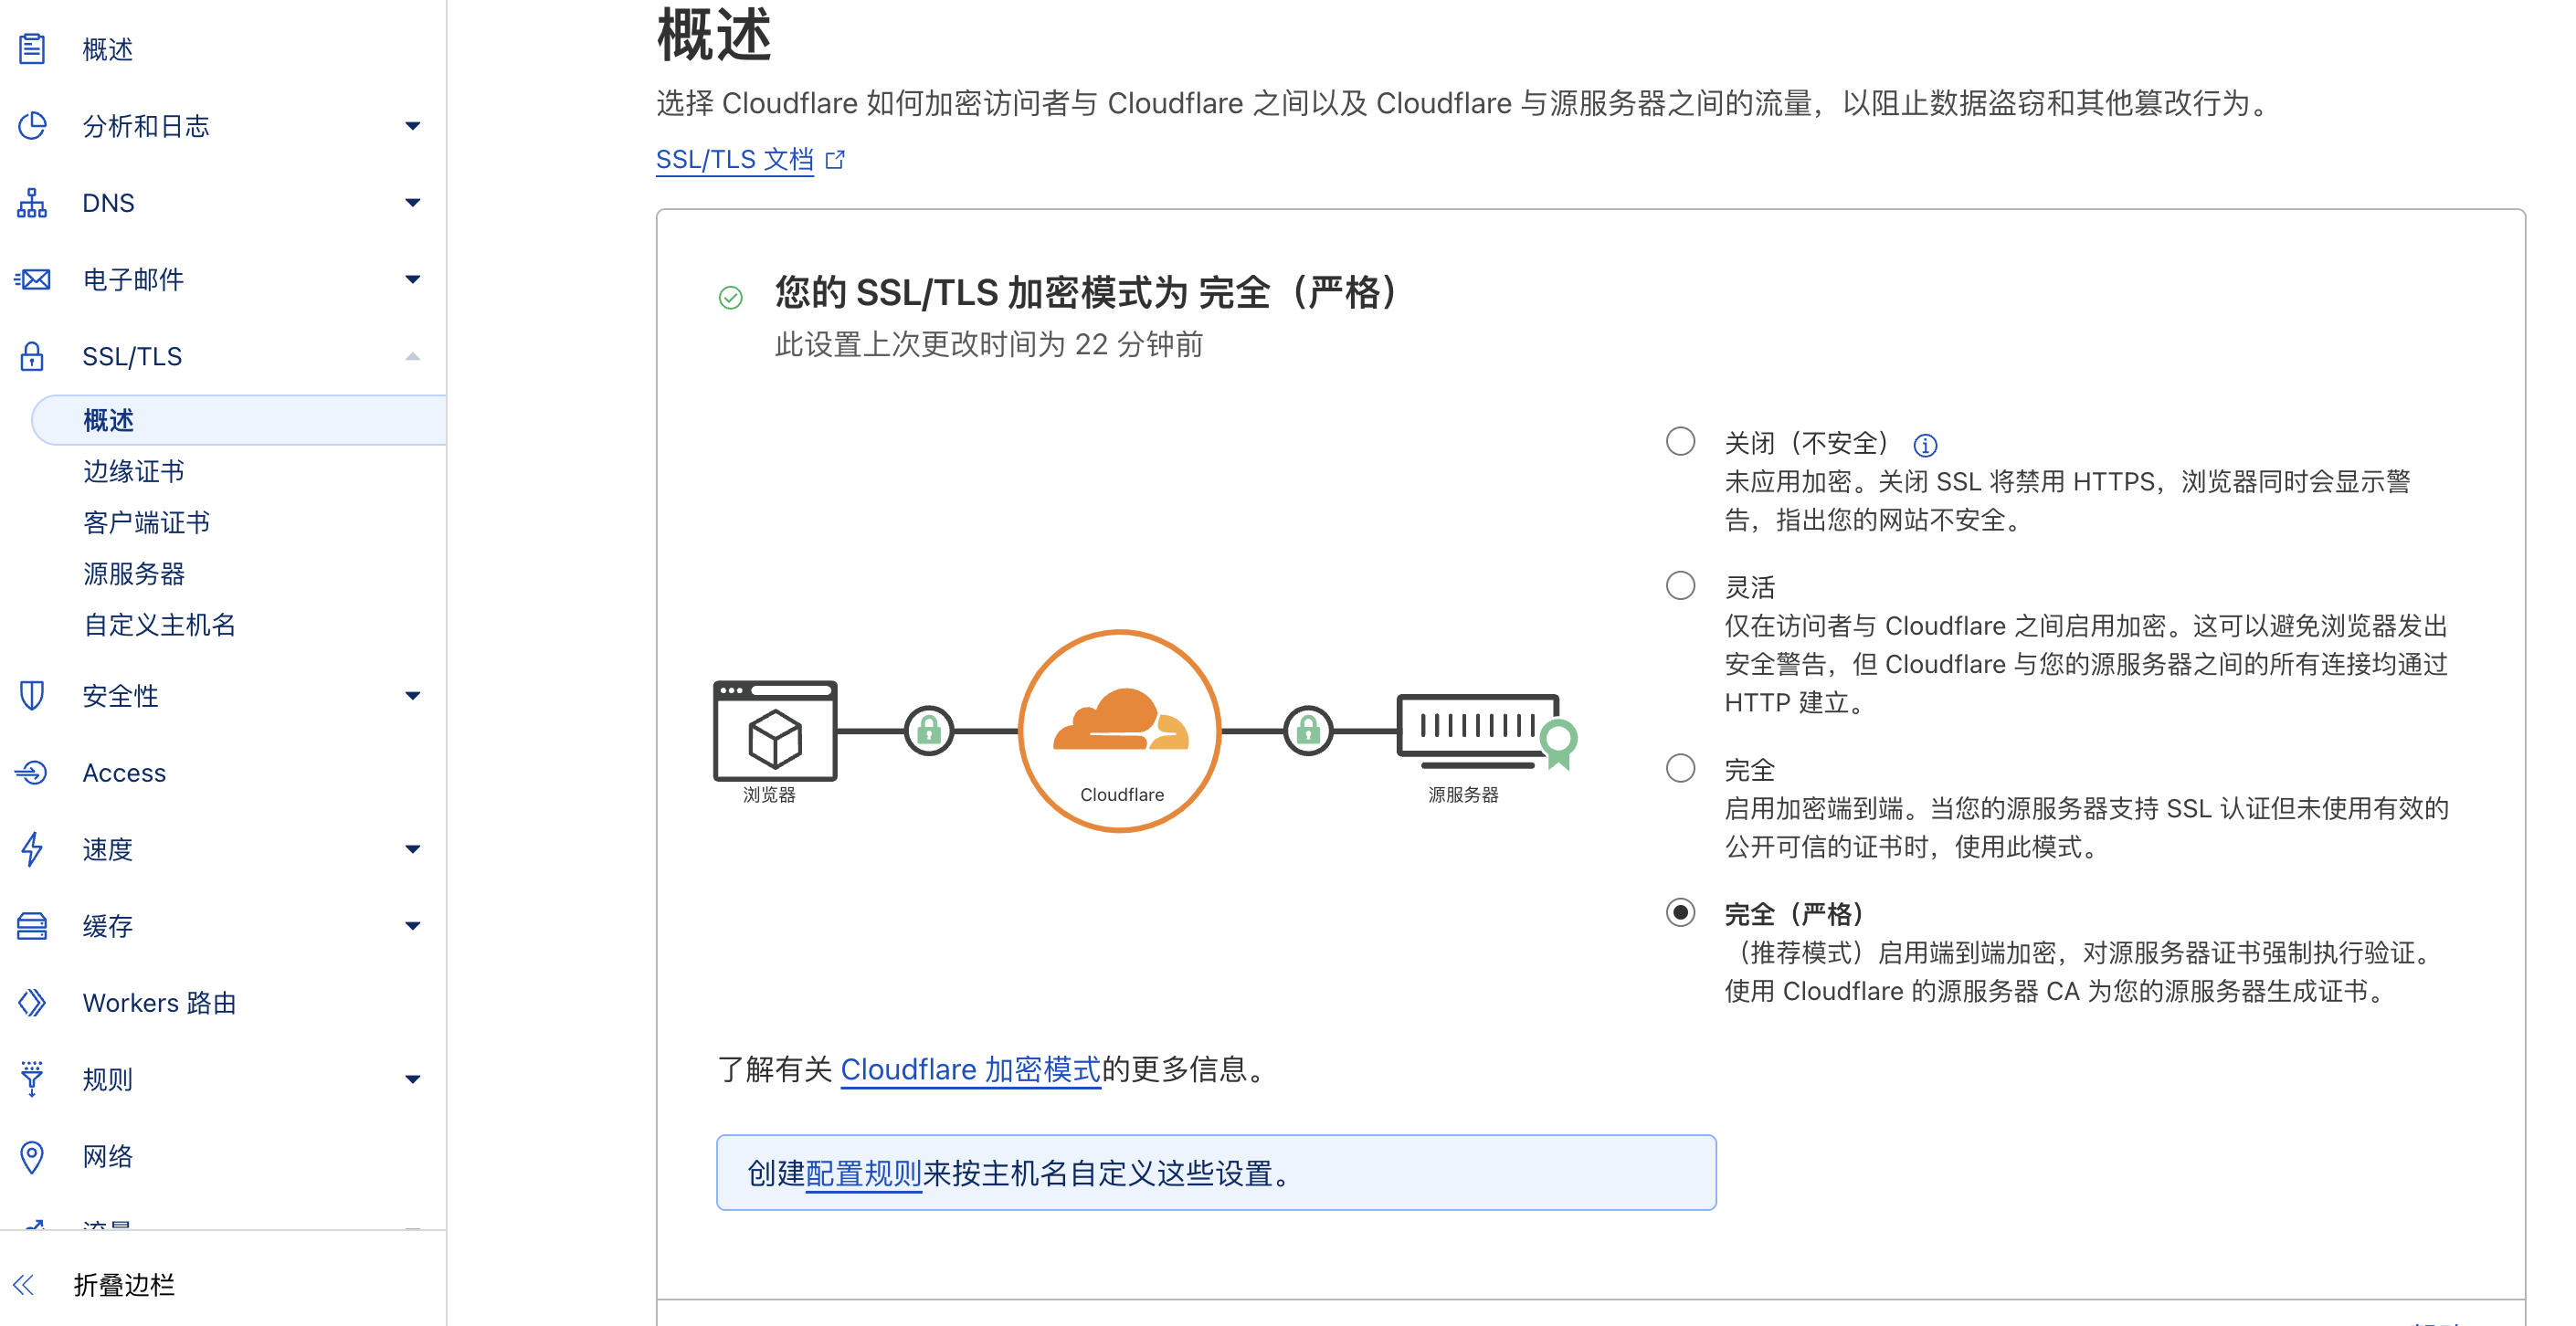
选择 cloudflare 申请证书的域名,然后点击 SSL/TLS 选项,选择 完全(严格) 的证书。

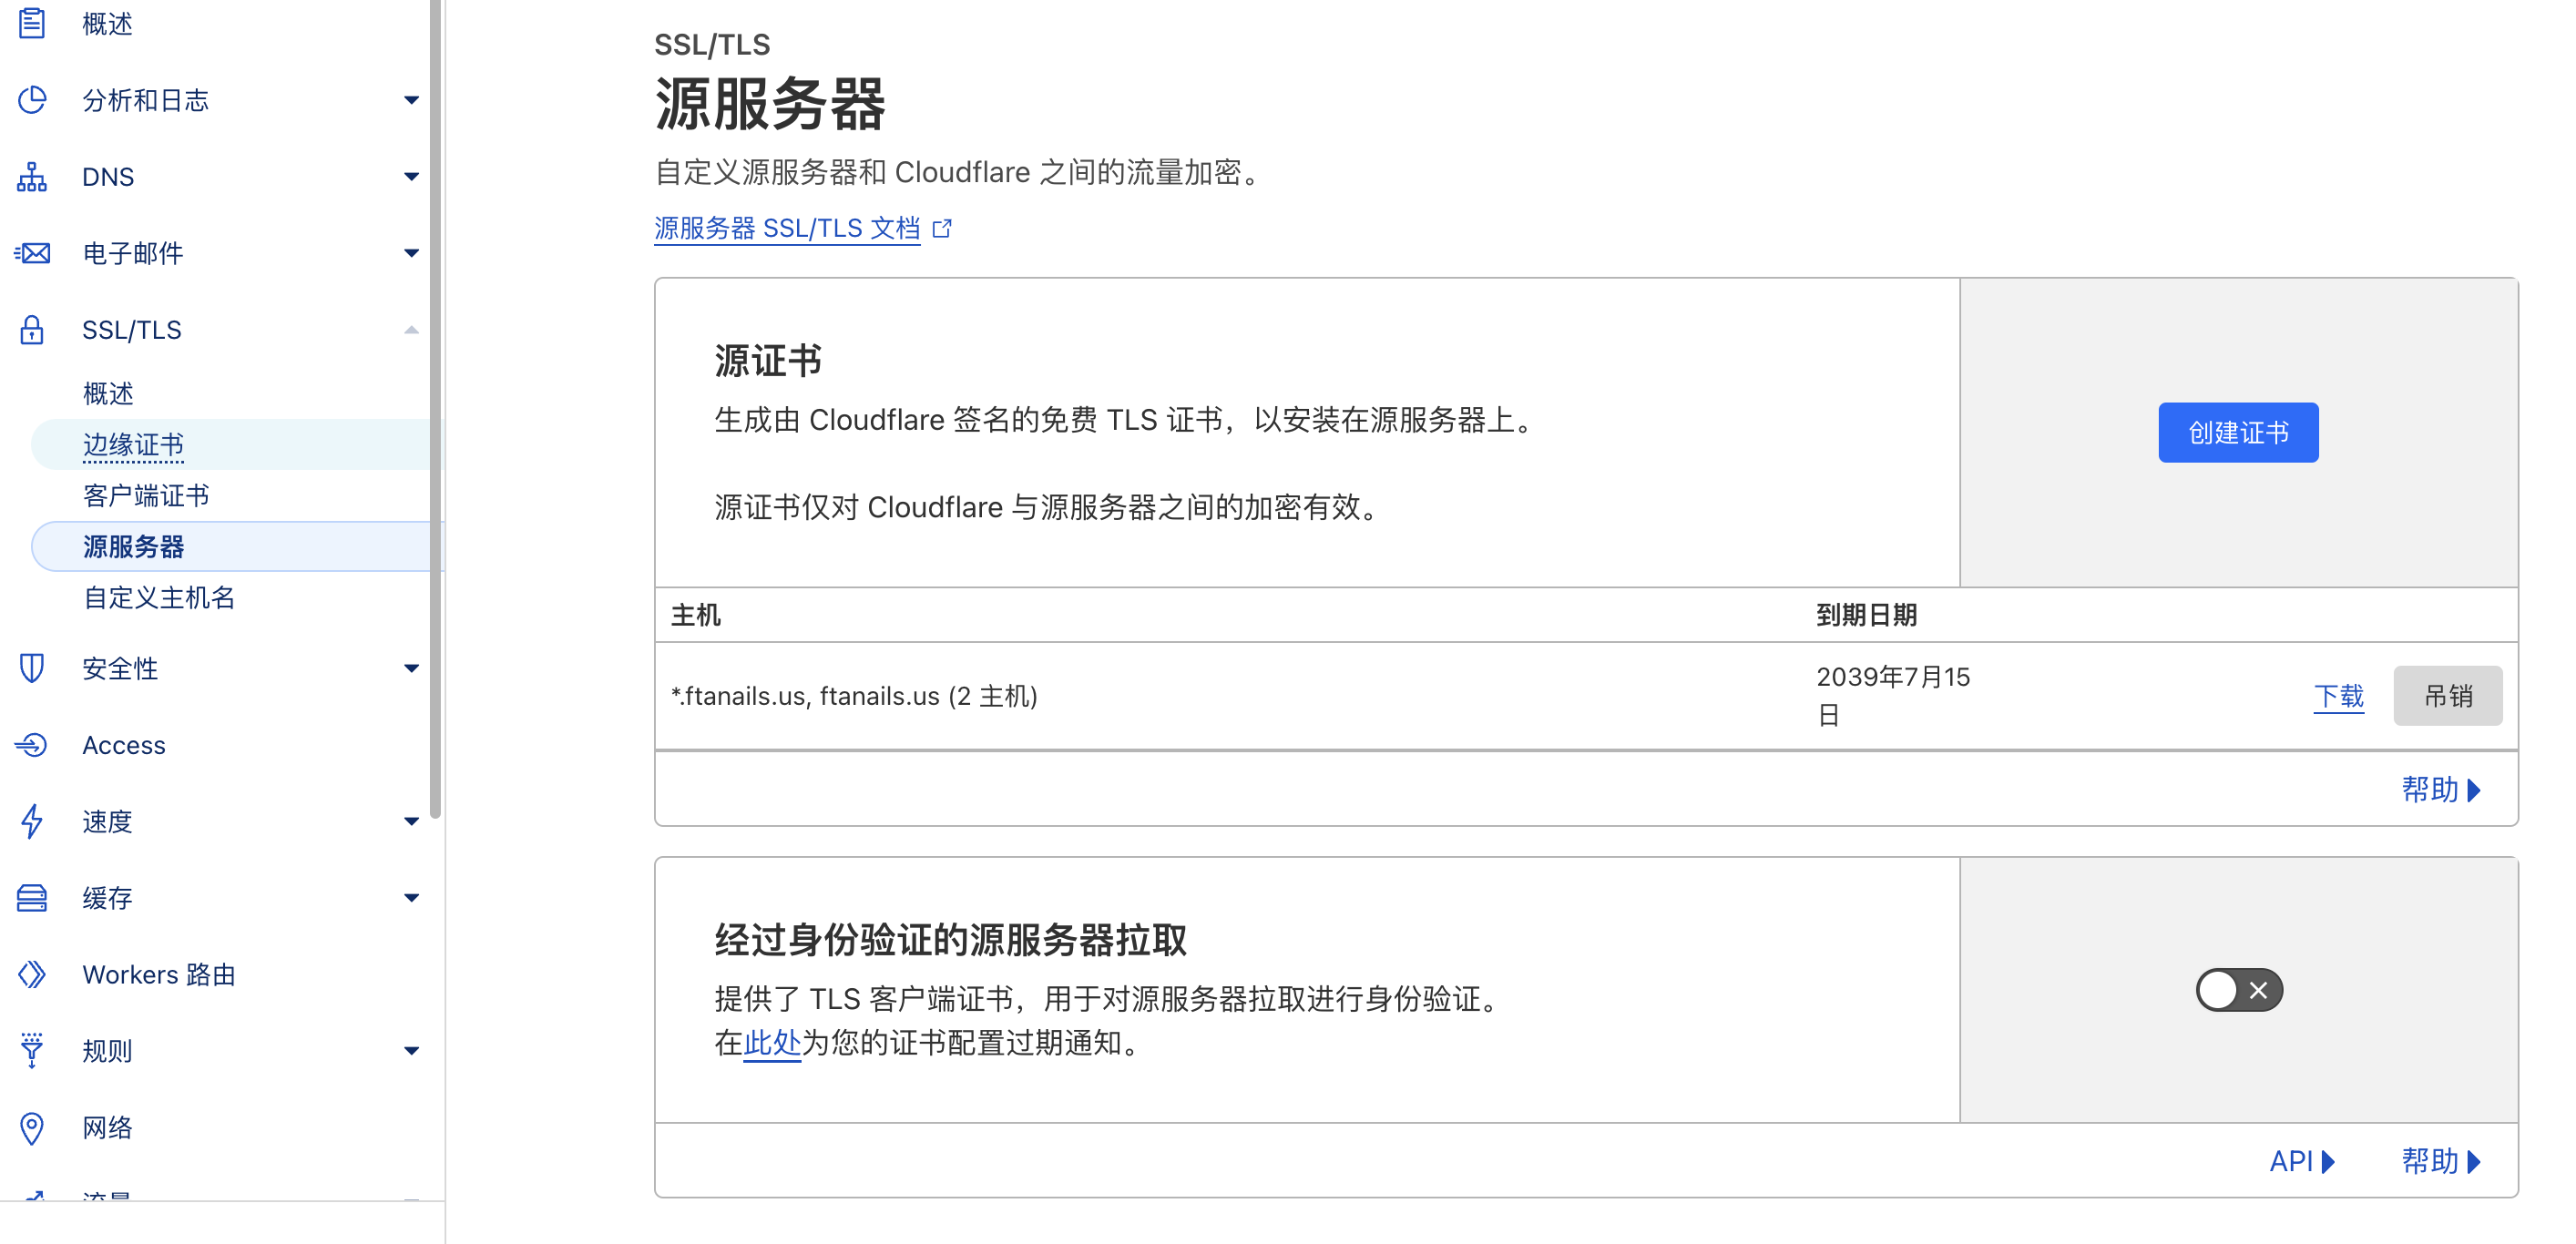
选择 源服务器 点击右侧的创建证书按钮, 创建需要的证书.

nginux 配置
g
sh
server {
	client_max_body_size 64M;
	listen 80;
	listen [::]:80;
	server_name ftanails.us www.ftanails.us;
	return 301 https://$host$request_uri;
}

server {
	listen 443 ssl;
	server_name ftanails.us www.ftanails.us;
	ssl_certificate      /etc/nginx/cert/ftanails_us.pem;
	ssl_certificate_key  /etc/nginx/cert/ftanails_us.key;
	ssl_session_timeout 5m;
	ssl_ciphers ECDHE-RSA-AES128-GCM-SHA256:ECDHE:ECDH:AES:HIGH:!NULL:!aNULL:!MD5:!ADH:!RC4;
	ssl_protocols TLSv1 TLSv1.1 TLSv1.2;
	ssl_prefer_server_ciphers on;

	location / {
		proxy_pass             http://127.0.0.1:3008;  # 這是Next.js App要監聽的port
		proxy_read_timeout     60;
		proxy_connect_timeout  60;
		proxy_redirect         off;
		# Allow the use of websockets
		proxy_http_version 1.1;
		proxy_set_header Upgrade $http_upgrade;
		proxy_set_header Connection 'upgrade';
		proxy_set_header Host $host;
		proxy_cache_bypass $http_upgrade;
	}

	# Enable gzip compression
	gzip on;
	gzip_types text/plain text/css application/json application/javascript text/xml application/xml application/xml+rss text/javascript;
	gzip_vary on;
	gzip_min_length 256;

	# Security headers
	add_header X-Frame-Options SAMEORIGIN;
	add_header X-XSS-Protection "1; mode=block";
	add_header X-Content-Type-Options nosniff;
}cluod iptagles
可以通过命令行的方式. 让 22, 80, 443, 3306 端口的流量通过 iptables.
sh
$ iptables -A INPUT -p tcp --dport 22 -j ACCEPT
$ iptables -A INPUT -p tcp --dport 80 -j ACCEPT
$ iptables -A INPUT -p tcp --dport 443 -j ACCEPT
$ iptables -A INPUT -p tcp --dport 3306 -j ACCEPT也可以使用下面的命令行手动编辑iptables的配置文件, 增加需要通过的端口号.
sh
 vim /etc/iptables/rules.v4
---
-A INPUT -p tcp -m state --state NEW -m tcp --dport 22 -j ACCEPT
-A INPUT -p tcp -m state --state NEW -m tcp --dport 80 -j ACCEPT
-A INPUT -p tcp -m state --state NEW -m tcp --dport 443 -j ACCEPT
-A INPUT -p tcp -m state --state NEW -m tcp --dport 3306 -j ACCEPTsh
部署网站
install tools git
sh
apt install gitinstal node.js tools
sh
npm i yarn -g
npm i pm2 -gdownload web project:
sh
git clone url-for-project
cd project-namepm2 start:
sh
pm2 start www/binpm2 show information:
sh
pm2 show idredis
mysql
====================
ubuntu 18.04.2
update and upgrade
sh
$ sudo apt-get updat
$ sudo apt-get upgrde
$ sudo apt install -y build-essential wget git vimInstall bash-completion
sh
$ sudo apt install bash-completion
$ cp /etc/skel/.bashrc ~/Install golang
sh
$ wget https://dl.google.com/go/go1.13.3.linux-amd64.tar.gz
$ tar xvf go1.13.3.linux-amd64.tar.gz
$ mv go /usr/localvim .bashcr, 在文件最后面增加下面的全局变量设置.
sh
--------------------------------------------
export GOROOT=/usr/local/go
export GOPATH=$HOME/workspace
export PATH=$GOPATH/bin:$GOROOT/bin:$PATHUbuntu Server 连接Wi-Fi
一、安装工具
$sudo apt-get install wpasupplicant二、生成无线路由密钥
$mkdir ~/wifiKey
$cd wifiKey
$sudo ifconfig wlan0 up /搜索wifi热点前需要启动网卡
$sudo iwlist wlan0 scan //搜索wifi热点
$wpa_passphrase ESSID PWD > essid.conf三、手动连接Wi-Fi
$sudo wpa_supplicant -B -i wlan0 -Dwext -c  ~/wifiKey/xxx.conf
$sudo iwconfig wlan0
$sudo dhclient wlan0 //DHCP获取IP四、配置开机自动连接
$sudo vi /etc/network/interfaces加入以下内容:
auto wlan0
iface wlan0 inet dhcp
wpa-conf ~/wifiKey/xxx.conf
# address 10.10.5.13
# netmask 255.255.248.0
# gateway 10.10.5.1